Thursday, March 1, 2012

Error "New partition table could be written" while installing XenServer 6.0

I was trying to install XenServer on 1TB disk with RAID configure and it was throwing below error message on Dell Rack mounted server.

image

This can be solved by two way by disabling GPT  :

1. Boot from the XenServers 6.0.0 install CDROM.
2. At the Xen 6.0.0 install prompt type menu.c32 and press enter.
3. When you get the new menu screen press TAB
4. add disable-gpt just before the last --- then press enter.  The system will go through part of the pre-install boot process.           5. At the bash prompt type "exit".

Installation will continue without any issue

OR

1. Type "shell"  at the boot menu

image

2. Edit the file constants.py under installer location using VI editor image

3. Edit the file and change the value highlighted from True to False and 4096  to 20480 and then exit

image

4. After existing the vim and boot menu , installation will continue .

image

Source : 1 and 2

Integration of Headset (Jabra 1900 USB) with XenDesktop 5.5

USB Headset like Jabra 1900 is quite popularly used by most of the call center because of  its lower cost and limited feature which is required by call center agent. The challenge with such headset is to map some of the feature of headset to the virtual desktop like mute and unmute button as shown below.
image 
The challenge start when it does not work as expected. We need to find out way to troubleshoot it. These button is heavily used by the callcenter agent while talking to the end customer over the soft phone. This is how volume is controlled


First step to trouble shoot is to use sound recorder . This sound recorder allow you to record and play back at the sametime. If mute and unmute works then you are good or else it will never work with softphone.

image
These button are mapped  via XenDesktop HDX policy via USB device redirection.
image
Once the Virtual Desktop is launch , USB can be mapped  it using desktop viewer as shown below
image
While using windows receiver , we need to make sure following setting is done under preference.
image 
Other way also is to use HDX monitor which can be downloaded from here. HDX monitor help to troubleshoot various issue related to ICA setting. This monitor clearly show what USB is mapped
image

Thursday, February 16, 2012

Integrating IBM Tivoli Access Manager for Enterprise Single Sign-On 8.0 on XenDesktop 5.5

IBM TAM-ESSO use its own GINA called engine.dll. When a new user logs on from the AccessAgent GINA, the private desktop first verifies that the user is a valid user, and then creates a Windows desktop for that user. It then loads the user's Windows profile, and creates the user's shell (starting Windows Explorer, and so on) for the user to interact with the desktop. When we install XD 5.5 VDA , it has its own GINA picagina.dll which works along with Microsoft GINA which is MSGINA. It is very important to understand how this authentication will take place as you want WI to perform AD based authentication for the VDA.

In order to integrate we should follow the order of installation of SSO and VDA. First AM-SSO is installed on Virtual Desktop.

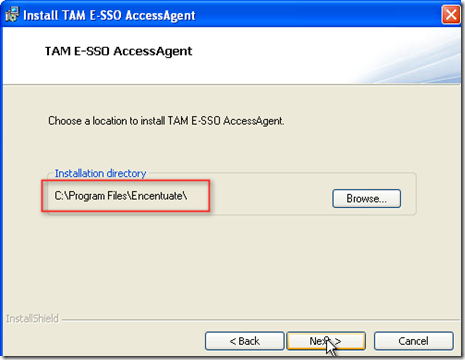
To install use executable and it will walk you through installation wizard

  1. Double click and run the wizard

image

2.  This TAM E-SSO agent create a folder called Encentuate which was acquired by IBM.

image 

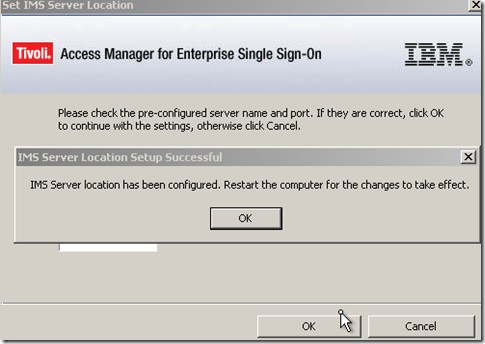
3. This is will ask for TAM SSO server

image

4.  Configuration of TAM SSO server will prompt to reboot.

image

5. After reboot  following screen will come which says GINA is modified . Login to windows logon

image

6. Check the following registry location and note down the change in GINA location . This Gina is from AM-ESSO which is "engine.dll"

image

7.  Now install the VDA 5.5 and reboot the machine check the same winlogon key  and verify the GINA. Now there is two GINA . One GINA modified by VDA and other had been added by Microsoft.

image

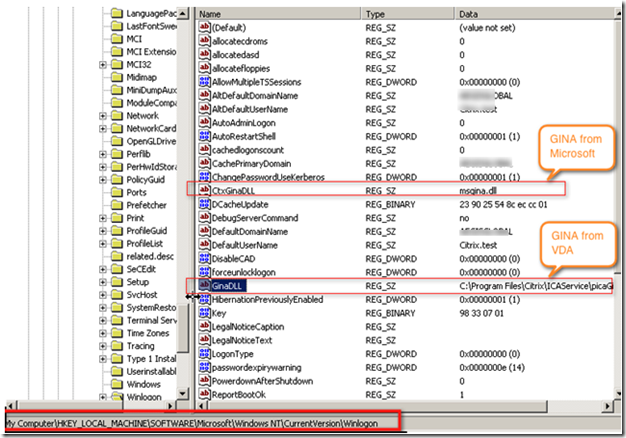
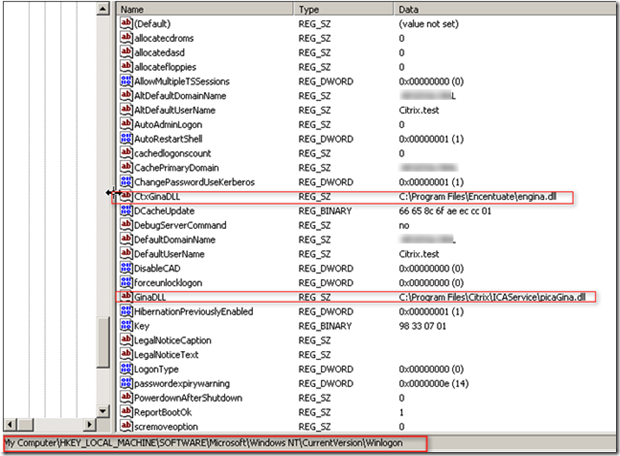
8. In order to work with SSO the sequence of GINA should be in the following order PICAGINA >> TAM-ESSO GINA >> MSGINA. Reboot this machine into safe mode and point both the registry key to following location.

image

9. After that VD is boot and assigned to the desktop group which I am not going to show here. Once the desktop launch it will be prompt for the AM-ESSO user name and password.

image

10. Once it is authenticated it will pass Active directory authentication . First time it will prompt to save the password

image

If you try to install the VDA first and SSO second then this is what the error message will come

image

Thanks to my friend Sandip for providing  CTX119665

Also Red book from IBM helped to give fair idea about AM-SSO GINA

Wednesday, February 15, 2012

How to Change Desktop Dirctor Dashboard Display

Desktop Director by default display only five count for display of Catalogs and Desktop Groups. 

image 

To change this display we need to make changes on IIS setting on Desktop Director server . This is located under Application setting of DesktopDirector website as shown below

image

After this change reset the IIS.  After this change Desktop Director display  10 setting. image

Monday, February 6, 2012

How to shut down arrogant VM on XenServer

Sometime VM hang and restarting xapi and toolstack  will not  help . There is a good way of doing this , oh yeah

1. Run xe vm-list and in this case INBLREHVDI0007 is the VM which says running image

2. Run list_domains command and find out domain ID . In this case it is 246.image

3. Destroy the domain using . This will sit as usual but press control + c and come out of the prompt.image

4. Run list_domains and check the domain ID has been changed.image

5. Reboot the VM and it will work perfectly .

image

Source is here